A sample practice plan to work on playing offense against a force middle.
June 10, 2015 by Sion "Brummie" Scone in Analysis with 1 comments
Maybe your team has a coach. Maybe not. Maybe, just maybe, your coach plans each practice in advance. If you’re really lucky, they’ll plan out a whole season’s worth of practices in advance.
If this describes your team, then be sure to thank your coach! As with anything in life, if there’s an objective (“make nationals”, “improve our ranking”, etc), you’re far more likely to achieve it if you have a plan.
Let’s take an example: your team has just played a tournament and everything was going really well until quarters. You traded until half-time, then your offense seemed to stall against a force middle defense, you got broken a few times, and ended up in the 5-8 bracket. Even worse, you beat that team the last time you met them. Sound familiar? A good coach will spot the issues as they arise, and – even if they can’t change the result on the day – they should be able to plan for how to make sure your team overcomes this obstacle in the future.
Here’s a sample practice plan for the scenario I’ve just described; more ultimate practice plans and drills to go with them are available on Flik.
**Practice tip: Always split a long practice into related themes, each no longer than 1 hour. This helps players to maintain concentration, and encourages you to incorporate water breaks.
Beating Force Middle Practice Plan
Objective: Practice playing vertical stack against FM defense
Duration: 2 ½ hrs
Warm Up
[15 mins]
Handler focus – 1 hour
Drill 1: Sideline Resets w/ straight up mark
[20 mins]
What: Start with the disc on the sideline with a straight up mark. The objective is to get the disc off the sideline; if you’re able to generate power position or a continuation throw to the break side, even better.
- Allow the defense to set up however they think best; keep varying positions to keep the offense sharp
- The typical upline cut used in a trap isn’t so effective here because of the straight up mark, so try cutting directly upfield, and rely on the thrower to do the work.
- A frequent mistake is to set up too close; try to have the dump at least 5 meters from the disc
- If you want to incorporate continuation options, just set up a player on the break side of the field to throw to; the better the reset, the easier this continuation throw will be. Remember that a good reset leads to easy continuation.

Why: The first drill splits people into groups of four; this gets everyone plenty of touches in a short amount of time. It’s also good practice to incorporate handler resets into every session, since resets are a vital part of any offense.
Drill 2: Breakmark on sideline w/ straight up mark
[20 mins]
What: This is a simple drill; set up cutters in the middle of the field, mimicking your vertical stack. A player with the disc starts a few yards from the sideline, with a straight up mark. The objective is to hit the cutter as they come under.
- No need for a defender on the cut, but if the drill is too simple then add one in; they should allow the cutter to have a single step separation
- The earlier you throw the disc, the bigger the target area and the more yards you’ll gain. So, look to shift that mark early (1) rather than just taking the obvious throw down the line (2), although either option works just fine
- Avoid throwing too many fakes; the longer you sit on the disc, the smaller the target area and the fewer yards you’ll gain. This is one of the drawbacks of the traditional “3 man drill”; it encourages players to sit on the disc and throw lots of fakes. Aim for one fake as a maximum!
- You don’t always need to “break” the mark; throw around, over…whatever achieves the objective

Why: Cutters are going to get into this situation a lot against FM. Being comfortable with a straight up mark is going to improve your offense’s flow.
Drill 3: Give & Go against changing mark
[20 mins]
What: When the mark’s direction changes mid-point, executing the give and go requires a slightly different approach.
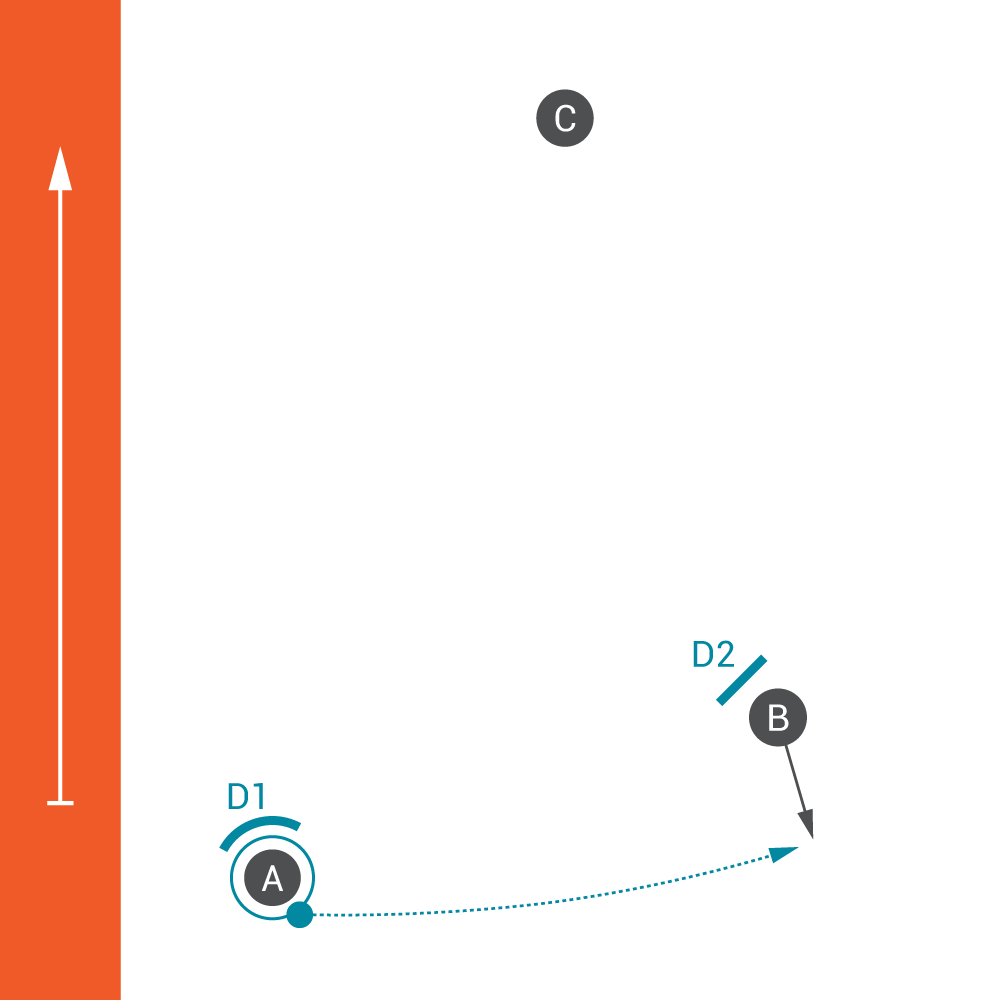
After throwing the open side pass (Fig. 1), (A) follows as usual in a give and go move. The difference in this one is that (B) should pivot infield for the return pass (Fig. 2)
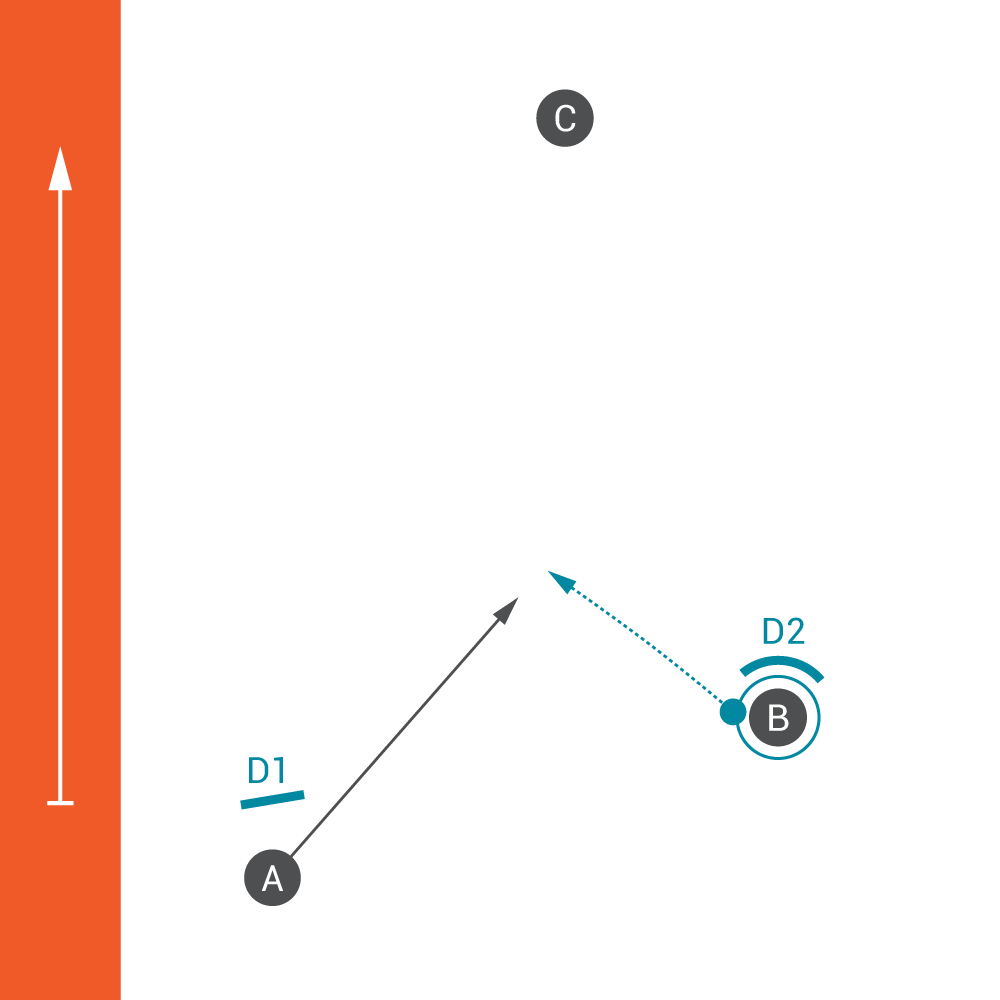
Pivoting infield here ensures that the marker (D2) is forced to foul if they want to prevent the throw, or to over-commit so much that the mark will be out of position and (B) can throw down the line instead
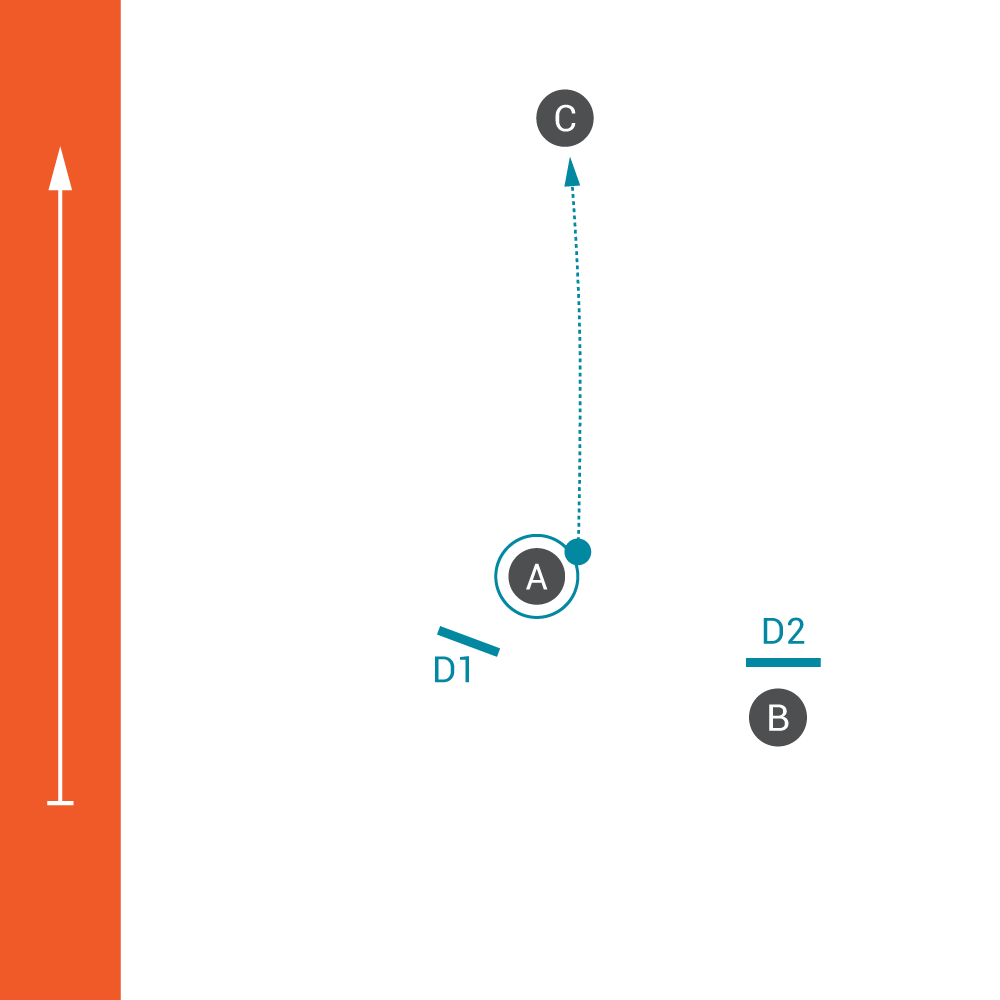
You can easily add static continuation (Fig. 3), or tweak the continuation to be a cut going away or under.
Why: A popular move for handlers against a straight up mark is to run an open side give and go. Against a force middle defense, this can run into problems as the mark shifts over.
Water Break
[5 mins]
Flow focus – 1 hour
Drill 4: Maintaining Flow in vertical stack
[30 mins]
What: This drill is to practice moving downfield in a vertical stack as the disc flows. The objective is to ensure that there is always a continuation cutter in a “good cutting position” whenever the disc is caught, and for the offense to flow all the way down the pitch along one sideline.
In vertical stack, a “good cutting position” is to have an isolated cutter who is able to cut deep or underneath for gain and at a good angle to the sideline. Typically, this means having a cutter around 15m deep of the disc in the centre of the field.
Begin with all cutters in a stack (note: for this drill you can have as many players in the stack as you like; I’ve run this with 10 or more). One player begins with the disc at the back of the endzone, and the cutter at the back of the stack is in a “good cutting position”.
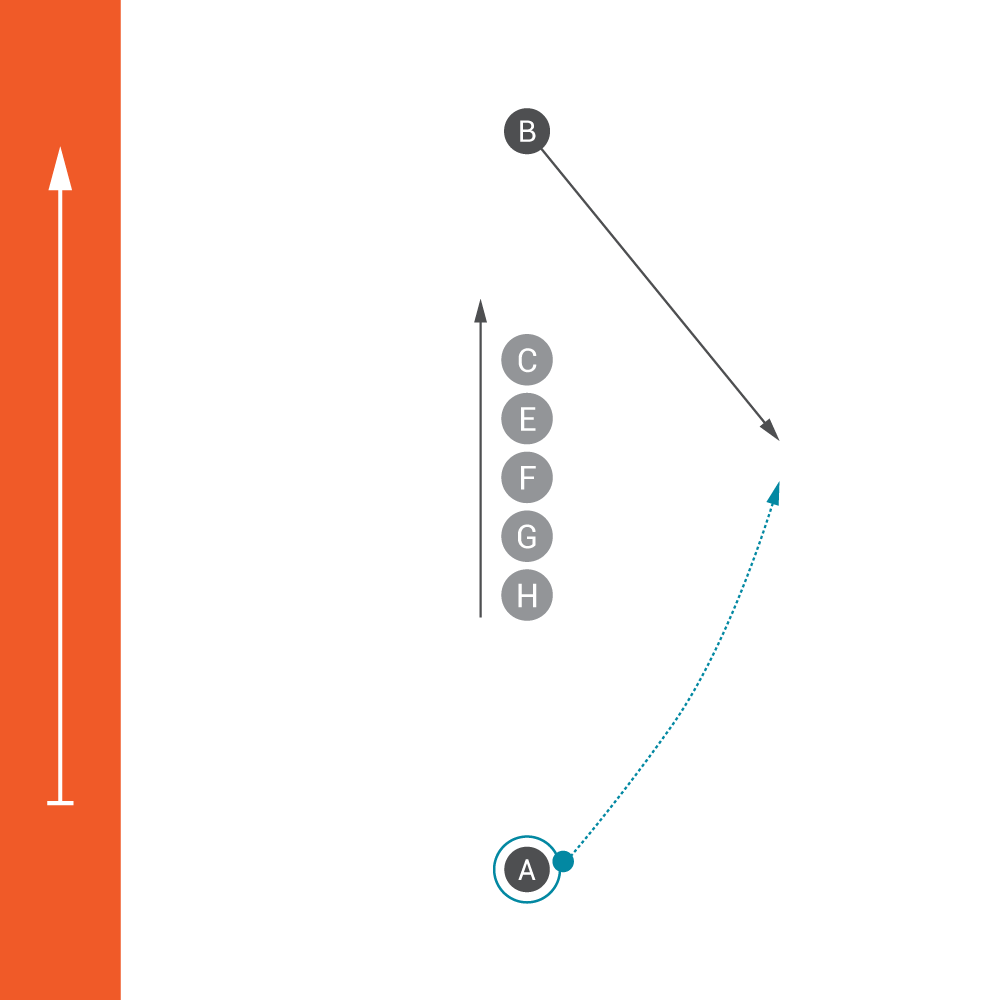
As soon as the disc is released, the next player in the stack – (C) – begins to cut deep while the rest of the stack all push downfield, aiming to maintain good spacing between the disc and the front of the stack. This ensures that both sides of the field can be used.
As (B) catches the disc, (C) should be in a “good cutting position”, so that (B) can immediately throw to (C). Continue this process all the way down to the other endzone, or until you run out of people to throw to.
Tips:
- When first used, it is best to ask your players to only throw to the underneath cuts; this gives everyone practice running the shapes. As they get more comfortable, look to move on to adding throws to away cuts
- Likewise, it’s best to start by throwing slowly and not running at 100% until everyone is comfortable with the movement. Progress to game speed as soon as people are comfortable with what is expected of them.
- If a player is unable to get into position early enough, then either stop the drill, or make it a little easier by either encouraging softer throws (which travel slower and so give your players more time to get into position), or allow minor delays of a few seconds between passes. It’s far better that cutters establish a “good cutting position” and cut with a good angle – even if slightly out of time – than to cut at the right time but make a poor cut.
- This drill is great for timing cuts & practicing repositioning the stack in response to disc movement. If you have lots of people at practice, start them in groups of six near one endzone and allow them to flow all the way down to the other end of the field; you can start the next group once one group gets to the halfway line.
Why: Good teams aim to generate flow, and all teams are forced to reset the disc when they run out of players to throw to! The offense has the upper hand when throwing to well isolated cutters, so the ability to get a continuous string of cutters in the right place at the right time will make flow easier, and reduce the number of resets that you need to hit.
Game to 3
[30 mins]
Rules:
- Playing only force middle.
- Rather than pulling, start each point with the offense on the corner of their own endzone line, with defense set. This ensures that your offense is really playing against force middle; otherwise it’s possible for the offense to score without the defense establishing a mark (which is great… but doesn’t practice what we’re aiming to practice here).
- Remember that the objective is to provide practice time against FM, not necessarily to win the game. So as a coach, encourage your team to try what you’ve just drilled and focus less on the outcome of the game.
Cool down & stretch
[10 mins]