Being fast isn't always enough.
November 10, 2015 by Alex Rummelhart in Analysis with 10 comments

This article is presented by Five Ultimate; all opinions are those of the author. Please support the brands that make Ultiworld possible and shop at Five Ultimate!
The number one goal of a downfield offensive player is to get open.
Sometimes, it is easy to get open as a cutter; other times (often, in fact) it can be quite difficult, whether you are matched up against a savvy defender, a fast athlete, or just a solid team defense.
To get open, it’s not enough just to be fast: you have to be smart, and it is always best to have a plan of attack on how to get the disc. It’s important to note that cutters rarely get open on a straight run to the disc, and that even with a fake or two, it can be challenging to break away from the defender.
Below are some advanced techniques for cutters, many that take slightly longer to develop than your average run. However — with the proper timing, practice, and coordination with your teammates — they work like a charm.
Here are five cutting moves that are guaranteed to get you open downfield.
1. The “Z” Cut
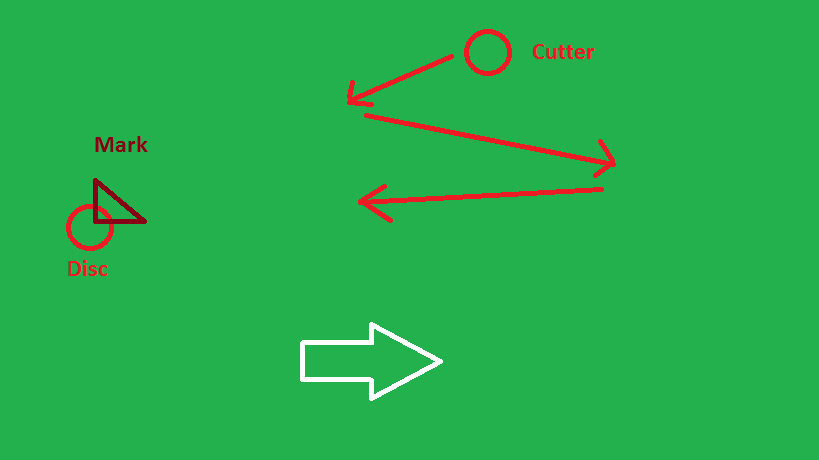
Target area: Under or deep Time to develop: Medium Best used in: Horizontal or side stack
Description: The “Z” cut — or “S” cut as it is sometimes called — has its biggest advantage in that it adds an additional fake beyond what most defenders are used to seeing.
Traditionally, cutters downfield will pick a direction, sprint a few yards, make a fake, and then change direction hoping to get open.
In a best-case scenario, the defender will commit or turn his or her hips on the fake, allowing a few yards of separation for the offender before the defense can give chase. However, good defenders can often times anticipate this and stick with their target for that preset amount of time.
The “Z” cut is effective because it gives two changes of directions, allowing two possible commitments from the defender (the three cuts making a sharp “Z”). Should either fake work, the offender will be open, either under or deep. This can work downfield out of any stack, but thrives in side stacks or horizontal stacks where cutters have a little more space to maneuver and can easily attack under as deep.
This cut does take a little extra time to develop (about 1-2 seconds of stall time) if that third cut is going to be hit; this means a handler needs to know that you aren’t just a one-and-done mover. It also requires more sprinting from the cutter (hence giving him or her another advantage over the defense) which can tire you out.
Don’t dance! Each of these moves has to be at least three yards long for them to be good sells. If done well, this cut is a rapid-fire 3-7 yard shuttle. If done poorly, this is two steps, a head fake, and a change of direction.
2. The Deep Pull Cut
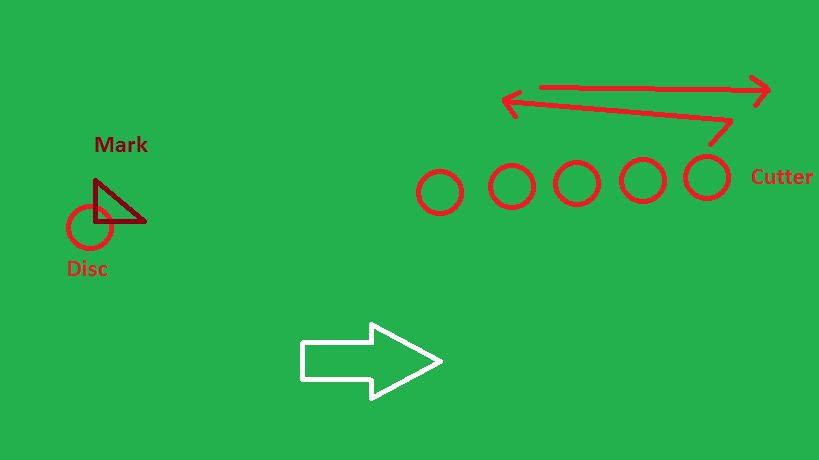
Target area: Deep Time to develop: Long Best used in: Vertical stack
Description: The deep pull cut uses the same hallmark that you’ll see in a lot of these techniques: it convinces the defense of one thing and then (just when they are relaxing convinced you aren’t open) you do something unexpected.
However, as a result, it has the drawback of a long development time.
In this cut, a player (best if it is the back of a vertical stack) will make a long cut (almost always under, and best to the break side). This cut should be hard and driving, as it needs to really be sold to your defender that you are headed for that disc; pull them in, then head deep.
After nearly reaching the front of the stack, your defender will commit to stopping this nine times out of ten. At that moment, a sharp change of direction (remember, sharp angles are key to getting open on ALL cuts) and heading deep can be deadly.
The handler, who needs to know about this cut, then puts out a huck out in front of you to catch in the end zone.
This cut does take 5-6 seconds of stall time and really works best as a pull play because everyone is on the same page (including the second to last cutter to avoid being poached) and the timing can be very smooth if this starts right as the disc is being tapped in or centered. However, if set up well in flow, it can definitely get you or a teammate open (if someone falls off to poach).
Remember to really commit to the under to pull the defender by driving hard under.
3. The Question Mark Cut
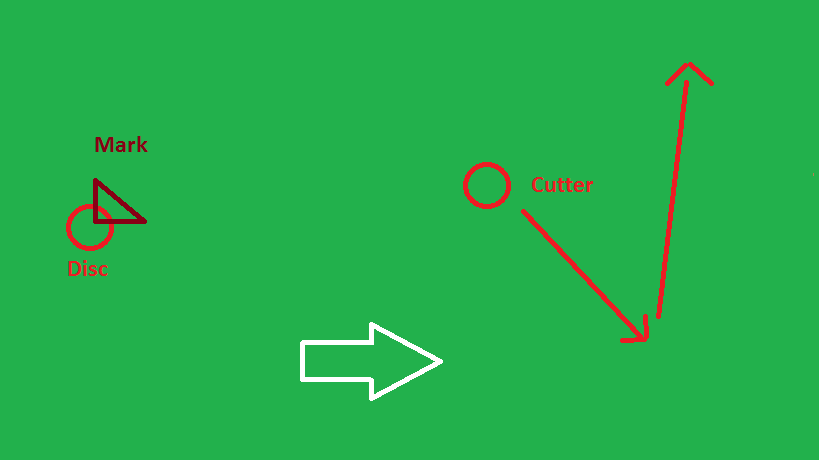
Target area: Endzone Time to develop: Short Best used in: Fast break
Description: The question mark cut is one that can be used everywhere, but really works best in the end zone on a breakaway after a turn. It requires minimal time, but a lot of horizontal space to be effective. In other situations, this can be really effective when working with handlers who have good over-the-top throws.
Taking a wide angle, attack a corner of a space or endzone, hoping to get hit with a fade or wide shot near the sideline. The defense, likely already a step behind, will scramble to stop you from getting the disc on the open side.
As much as you might seem open, this is a very hard spot to hit; you are running away, running out of space, and being closely trailed.
Most offenses can click instead on completing a question mark shape by planting, and then cutting hard across the front of the thrower to the other side of the space (which may be the break side, but likely has a lot more open room).
This is dangerous when there are a lot of players around because it can cut off your teammates, but when isolated, this can work, you’ve just got to really stretch your target.
4. The Break-Live Cut
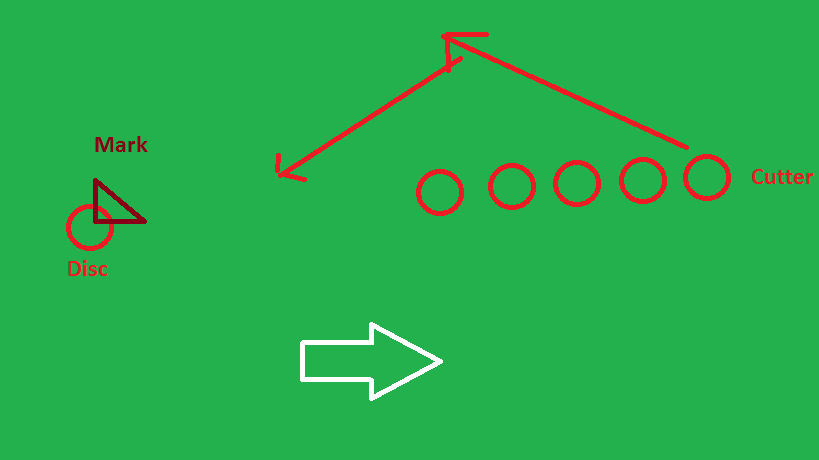
Target area: Under Time to develop: Medium Best used in: Vertical stack
Description: This very simple cut seems like it wouldn’t be very effective, but can actually be a nice little trick in your arsenal that is more effective than not.
Cutting downfield (usually in a vertical) often means trying to get a step towards the break side. Aiming that way, defenders will trail, often giving a slight cushion, but may worry enough to want be ready to make a play or a block should a break throw go up.
This cut takes place late in that sequence; the stall count might be low or high (indeed the disc might be ready for a dump or swing), but it doesn’t matter.
As your defender starts to ease off, convinced that you are not a threat on the break side, come sharply back across the field to hit the live side either in front of the thrower or at a swing. The defense probably anticipated you were about to clear and return to the stack, but you’ve made yourself twice as dangerous.
This cut also works well with a wide target area, but can be effective because it can at times act like a clear (as long as you aren’t blocking any teammates, especially the front of a vert stack).
A slightly varied version of this can work as the isolated cutter in the end zone as you drag your defender to the break side, giving you lots of open space for a skinny break.
5. The Push and Pick Cut
Target area: Any Time to develop: Low- Medium Best used in: Isolation
Description: Sometimes you want to get open one-on-one, whether you are in an isolation end zone offense or have the whole field to work with.
If you have a lot of space and you have a thrower who is only keying on you, take advantage by forcing your defender to respond.
This works best if your mark is squared up to you (neither shading deep or under, but horizontally equivalent). Run right at the defense with two or three hard steps, aiming for one shoulder to get past.
The defender, likely not expecting this, will rock back on his or her heels; a lot of times, this flat-footedness will allow you to cruise past straight to the open side.
If the defender is giving you a lot of space (say in a side stack) or being physical enough not to rock back, they still are giving you command of the field. Push them to make a defensive decision (usually to block you force-side under) and then sharply change direction by picking the other side to attack.
In other words, get your defender to commit, to move to blocking something, therefore often changing directions (it is extremely hard to back pedal on balance at a fast pace). You can then get a step or two of separation when you turn ahead of him or her, and in isolation that is often all you will need.
If you’re isolated in the end zone, this often means coming back across the center of the field (great for a straight ahead open side throw, skinny break, or around break: three options!). If you are in a side stack or isolation but not near the endzone, this means heading to a lot of open deep space.
You may have to be physical and you need to push just far enough to cause the defender to move (but not far enough to allow him or her to drop under you).
Takeaways
Practice these moves with your teammates and talk about them (especially with handlers). Maybe turn a few of these moves into simple calls than can be executed off of a dead disc situation.
Run hard, use sharp angles, and attack the space, and you’re bound to get open.
Next week on Tuesday Tips: 5 Handler Moves Guaranteed to Get You Open
